FLICKERING FLAG
Add more forces, and a flickering effect
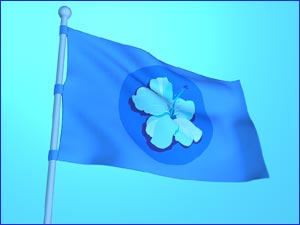
The flag, rendered without Displacement Map
In this tutorial from Syflex, we will add a few more details on top of the basics
covered in our laundry tutorial. We will
create a flickering effect, first by using the syFlex forces, Wind, Turbulence
and Air. We
will then show how Maya's Displacement Map could be used for an additional effect.
For the displacement map we have a ready-made set of frames
for you, coming all
the way from Tel Aviv. TD Haim Sarusi, who works at JCS created them and used this
exact effect in the creation of the
"India Project", featured on our website.
We used Maya 6.0 for this tutorial, and we started by constructing a pole
to attach the flag to.
You can build your own pole, or download this Maya Scene,
where you will find a ready-made pole, complete with three loops.
01. CREATE YOUR FLAG SHAPE, make a poly mesh:
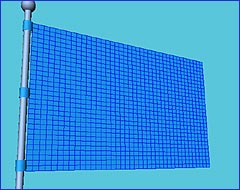
Creating and positioning the poly shape
Follow those dimensions to have the following effects work
for you: Our flag is Maya's default 1x1, scale X - 5, scale Y - 1, scale Z - 3,
subdivided by 10 width and 16 height.
Translate and rotate your plane to the position you want to start the animation from.
It is better to do all the translation before you turn it into a syCloth.
02. CREATE CLOTH, turn the plane into a syCloth:
The syFlex T-Shirt icon
Select your plane, and turn it into a syCloth, by calling:
Syflex > Cloth > Create Cloth
The flag shape is now a syCloth (in wireframe view you can see it is highlighted)
and a T-shirt icon appeared in the middle of the grid. This icon can be moved and
scaled, and is handy in many situations. You can easily select the syCloth by
selecting it. Each force and constraint come with their own special icon.
03. GIVE YOUR SYCLOTH CHARACTER, define attributes:
SyCloth attributes
SyGravity attributes
SyDamp attributes
You can now create Gravity and global Damp forces, to affect the flag. Select
the syCloth, and call:
Syflex > Forces > Create Gravity
(Select the syCloth again) and call:
Syflex > Forces > Create Damp
Note the values we entered for the various attributes, and follow them at first
to get the same results.
By turning "Active" off, you can mute the force temporarily. This
is very useful for testing. "Precision" usually stays at the default value, but it
can be increased a little bit, to make the simulation faster (It will however make
it less accurate).
We added self collision by entering a value in "Self Envelope". Collisions tend to
make the simulation slower, so keep them to the end. Here, the Self Envelope
prevented the flag from penetrating itself.
04. PIN THE FLAG TO THE POLE, add three pins:
Pinning the flag to the pole
We want the flag to stay attached to the three cylinders. For that we need to create
three pins. Select the vertices to be pinned, the related cylinder, and call:
Syflex > Constraints > Pin
Another way to do this is to combine the three cylinders and then you only
need to pin once.
The Pin constraint also comes with its own icon, and attributes. For the purpose
of this tutorial, they are not modified.
05. PUT WIND TO WORK, add a Wind force:
syWind attributes
Select the syCloth and call:
Syflex > Forces > Wind
The wind default values are way too strong for our small flag. There are two ways
to tweak them, and we used a combination of both. You can either enter values in
the attribute window, or manipulate the syFlex Wind icon (a triangle)
in the 3D view (translate
doesn't affect the Wind force, but rotate and scale do!).
It is convenient and intuitive to tweak the Wind through the icon,
but it's not necessary. It
can be completely controlled through the attributes.
The Delta Wind "disturbs" the main Wind. We recommend that you define your Wind
first, and only then add Delta wind.
The Wind works in a random cycle. If you want this cycle to be the same each time,
enter any number in the Seed attribute.
06. REFINE FLAG BEHAVIOUR, add more forces:
syTurbulence attributes
syAir attributes
To create an additional natural movement in the flag,
we applied Turbulence and Air.
Select the syCloth each time, and call:
Syflex > Forces > Turbulence
Syflex > Forces > Air
The Turbulence makes a movement for each "square" of a grid which you define in
the Grid Size attribute, and you can also control its intensity, and frequency.
Air adds more damping on the sides of the object. It slows down the animation,
smoothes out waves and penetrations, gives a more solid feel to the flag, as if
it was made from a heavier material, which is what we wanted. Without it, the flag
looks like it's made out of a light material, such as silk.
In the case of a Tshirt,
you can make it influence only one side, by turning the One Side attribute on.
In the case of a flag, it needs to influence both sides, so keep it off.
06. ADD LITTLE RIPPLES, using Displacement Map:
Displacement Map Shader
For this step, you need to have a little bit of experience with Maya's Shading
Networks, and a set of frames, such as the one Haim kindly provided us.
In the Hypershade, create a Phong material, and a 2D texture File (make sure
it is in "Normal" mode). Connect the File node to the Phong's displacement
(middle click on the File and drug onto the Phong - a menu is opened -
select "displacement map").
Right-click on the Phong and select "Graph Network". You can see the connections
now. Open the File node and in "Image Name"
(inside the "File Attributes" tab) select the first image in the loop
("flag_loop_by_Haim.1.jpg"). Check the option: "use image sequence".
Assign the Phong material to the flag.
Select the flag and open its Attribute Editor. In the Displacement Map tab, click
on "Calculate Bounding Box Scale". This might take a little while.
Render the sequence.
If you have artifacts on the edges - you can crop the texture by adjusting the UVs.
The flag is displaced towards its normals, therefor the Displacement Map
works best when the flag is in an angle to the camera.
Haim's sequence of 100 frames makes a perfect loop, but to have an animation longer
than 100 frames, you have to modify the shader:
- Delete the expression Maya created automatically
- Set keys at frame 1 and frame 100 in the "Image Number" field, found in the File node.
- Go to the Graph Editor, focus on the Frame Extension, select the curve and Call:
Curves > Post Infinity > Cycle
To control the level of influence the Displacement Map has on the flag,
tweak the value
of the "Alpha Gain" (found in the Color Balance tab in the File node). For our
flag animation, the value is 0.005.
>>>download Haim's set of frames.
In-depth information about every aspect of syFlex, including the elements used in
this tutorial, are available in the software documentation.
If you have any additional questions, do contact us at:
users@syflex.biz
|